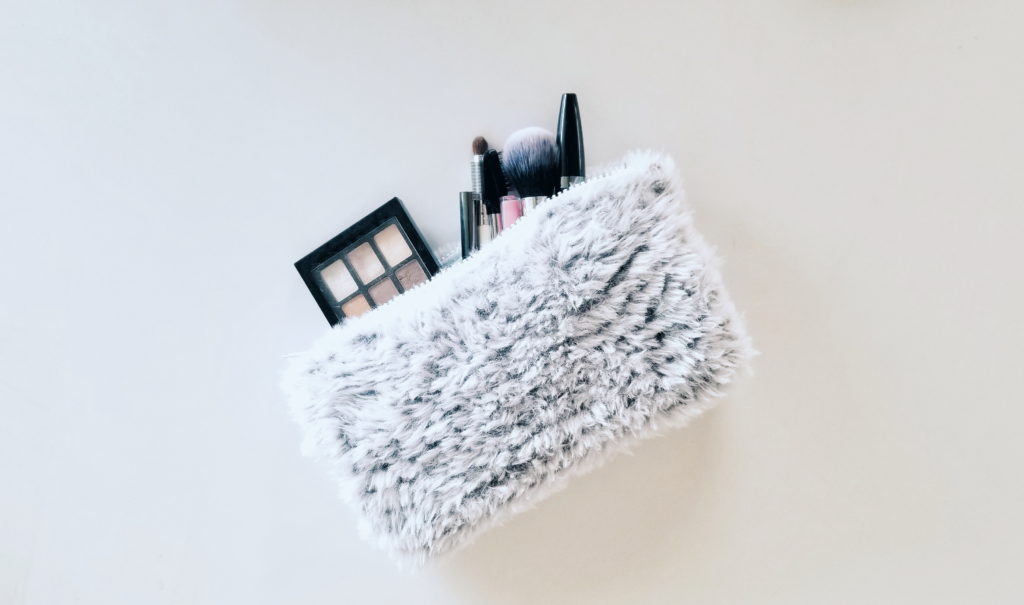
Knit Faux Fur Bag
I’m back! You guys… when they say “life has a mind of its own ” it’s no joke.
If you want to get straight to the free pattern scroll down! This post contains affiliate links that help support Brindle Babe Designs Content.
I thought I’d share a little insight into why I’ve been gone and why I haven’t been releasing any patterns this summer. It’s been a rough couple of months that my boyfriend and I were not quite ready for. We had planned to leave California in early 2020 but like I said we have no control over life’s plans. I was born and raised in California, moving away a couple of times before but always coming back. I moved back from New Mexico 5 years ago and after working for some of the worst management out there I finally broke down and came to the realization I don’t want to live the corporate lifestyle and I no longer want to be in California. I had been living in this “survival mode” since about the time I moved back and if you’ve ever had to experience this you’d know its super draining and you’re always left unhappy but the continual rise in prices leaves you no choice. I so badly wanted to pursue this creative venture but living in California would never allow me that or any of the other the other things my boyfriend and I wanted out of life. So when we were thrown a curve ball with our jobs we ultimately decided to move up our plans and move to Arizona! So as much as I wanted to continue releasing fun summer patterns for you guys I decided to take a break to focus on moving.
But good news! In the midst of all this craziness I was offered a position with Furls Crochet! I not only managed to find a job in the creative industry, but I get to work from home and I am still able to focus on my pattern designing as well. I managed to check off 4 things I had been wanting so bad for so long which was get the heck out of California, work from home doing something that makes me happy and have the time to design! We all have seasons in our lives and the past 5 years were really tough but I learned a lot of things about myself, I am way stronger than I thought and learned some great professional skills that I have been able to bring to my new position and my business. So even though its been difficult and we are still not quite out of this tough season I’m thankful for where we are.
I’ve been pretty behind on everything and totally not ready for fall but I’m excited to dive back into designing! I thought I still had some more summer time, I mean we still have 2 full months of heat left here. But it seams like as soon as we hit August its instantly Fall! haha! So if my patterns seems a little off season, bare with me while I catch up 😅. I would say this could be considered a fallish pattern though.

So here she is the unveiling of my first knit pattern! If you have been wanting to learn to knit this is a great pattern as it only uses one stitch and the construction is made up of a simple square.

Pattern
-Get a copy of the ad free printable pdf pattern here
-Pin the pattern for later here
Materials:
US Size 8.0 mm Knitting Needles
Scissors
Tapestry Needle or Crochet Hook
(Weight (6) Super Bulky, 3.5 oz, 64 yards)
You can find all of the following supplies at
¼ yard of fabric

“>zipper

Skill Level: Beginner
Abbreviations (US terms):
Co- Cast on
k- Knit
ws- wrong side
rs- right side
Gauge: Gauge is not important.
Measurements: 11”x11” laid flat before folding
Pattern Notes:
This pattern is worked in a simple square. The fabric insert is measured out and the sides are sewn up. The zipper is first sewn to the fabric. The sides of your fur piece are sewn up. Then the zipper is sewn to the fur piece to finish off.
Pattern
CO 20 stitches (keep at least a 6 inch tail for sewing ends)
Row 1: K each stitch across
Repeat row 1 until you reach about 11 inches.
*Note: You can stretch the fabric to size.
Cast off all stitches (leave a 6 inch tail for sewing ends)
Insert
Step 1: Iron out any creases in your fabric.
Step 2: Measure fabric to fit your fur piece.
Step 3: Fold fabric in half (ws facing out) and sew sides about half an inch from the edges.
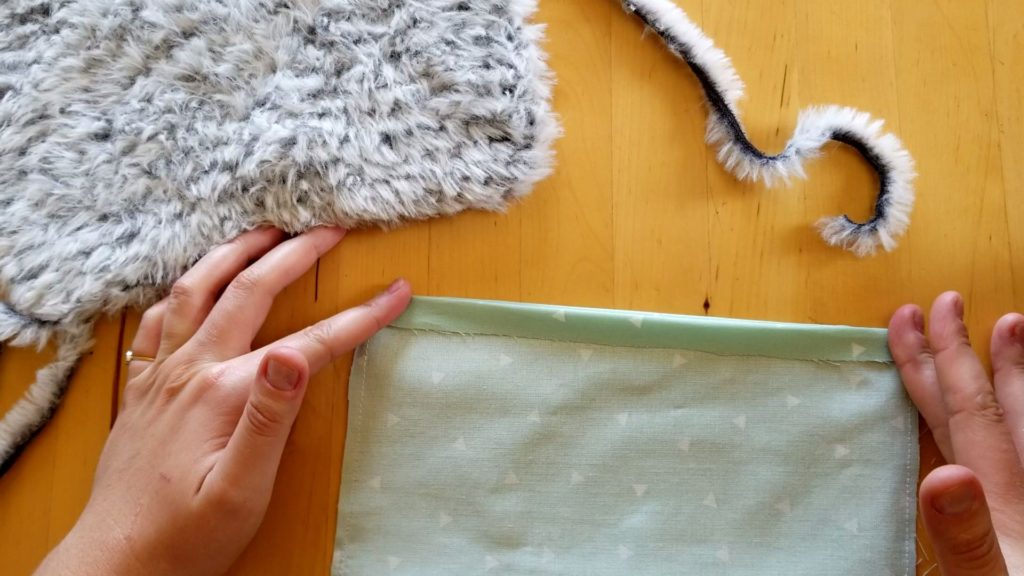

Step 4: Place fabric on top of fur piece and fold in half around fabric, cut any excess fabric.
Step 5: Sew up sides of fur piece. Turn rs out. * I used a crochet hook to slip stitch, but you can use a tapestry needle to sew ends also.
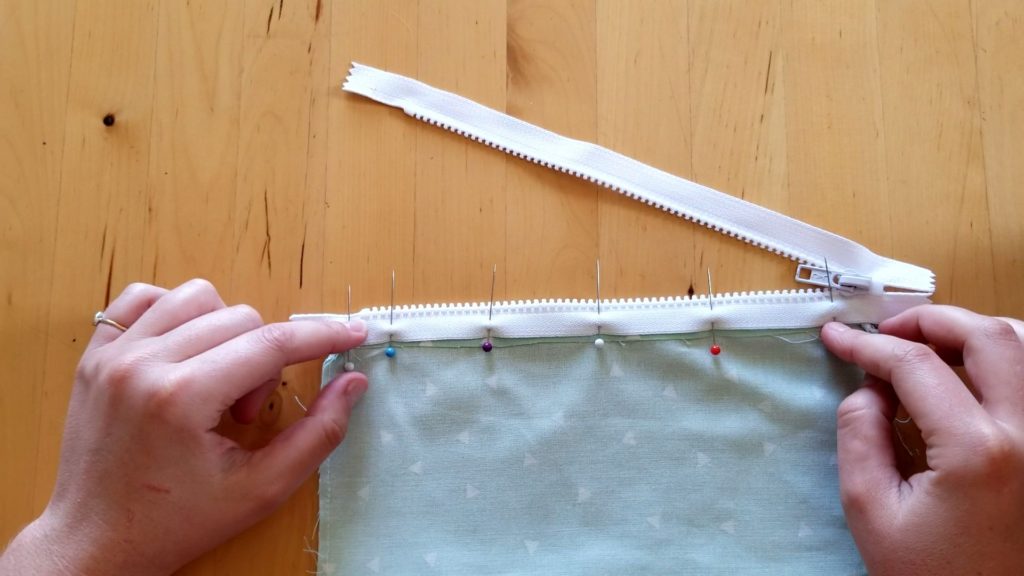
Step 6: Pin zipper to the top of your fabric and sew each side across.
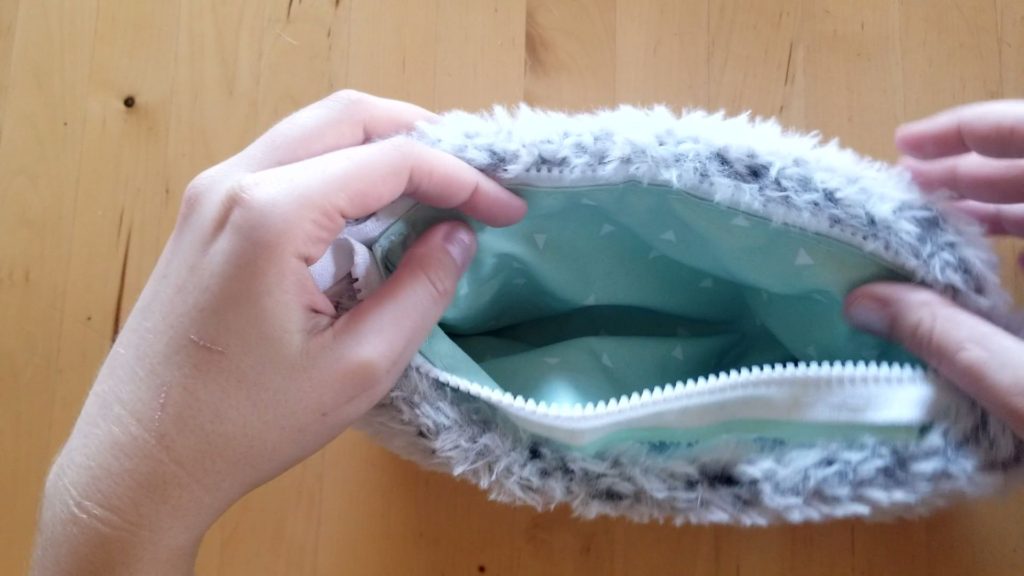
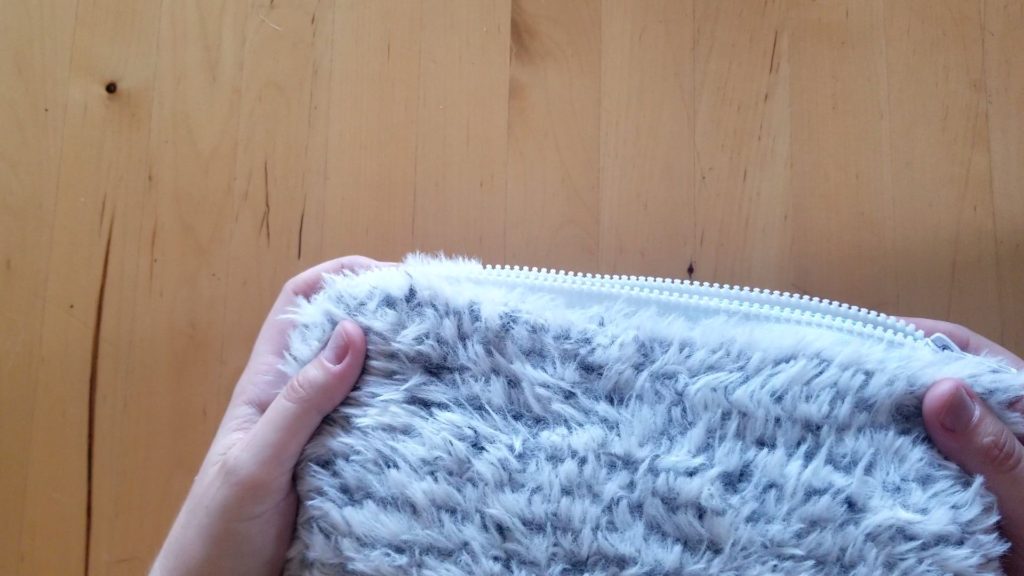
Step 7: Place your lining into your fur piece and pin to the zipper. * Don’t pin the fur too close to the zipper, you don’t want it to get snagged when you open it! Now sew all the way down on each side.


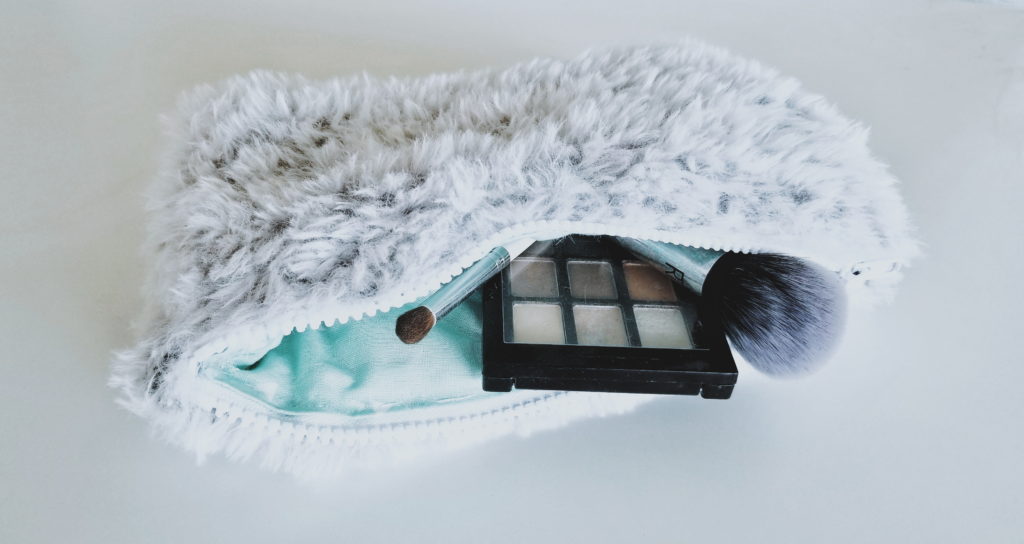
I’d love to see your finished pieces! Please tag me if you share photos on Instagram @BrindleBabeDesigns