This post contains affiliate links that support Brindle Babe Designs content.
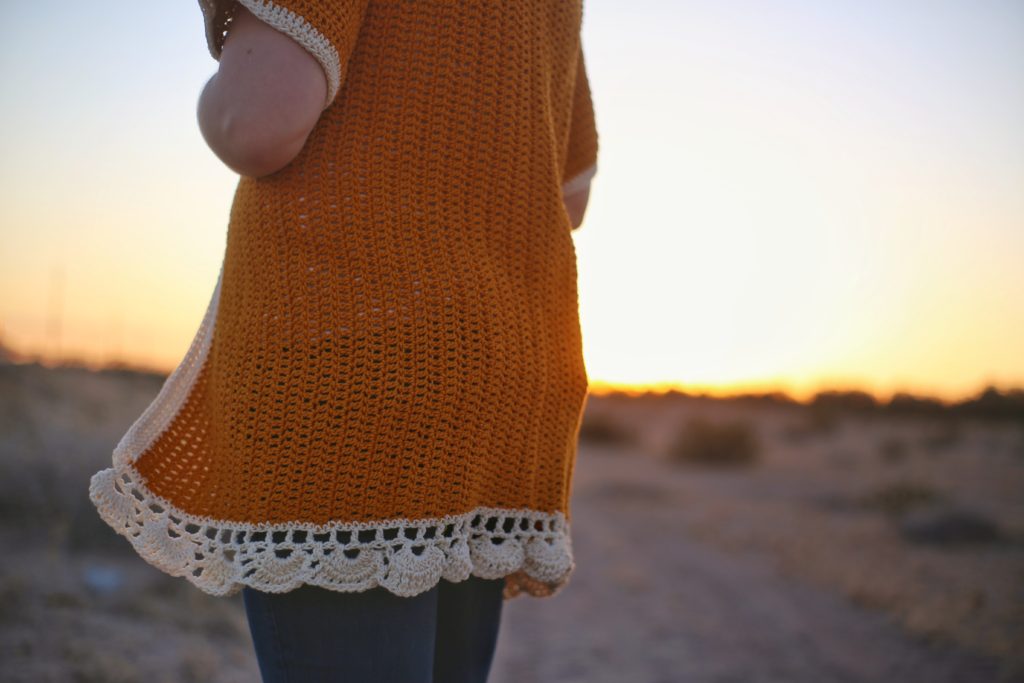
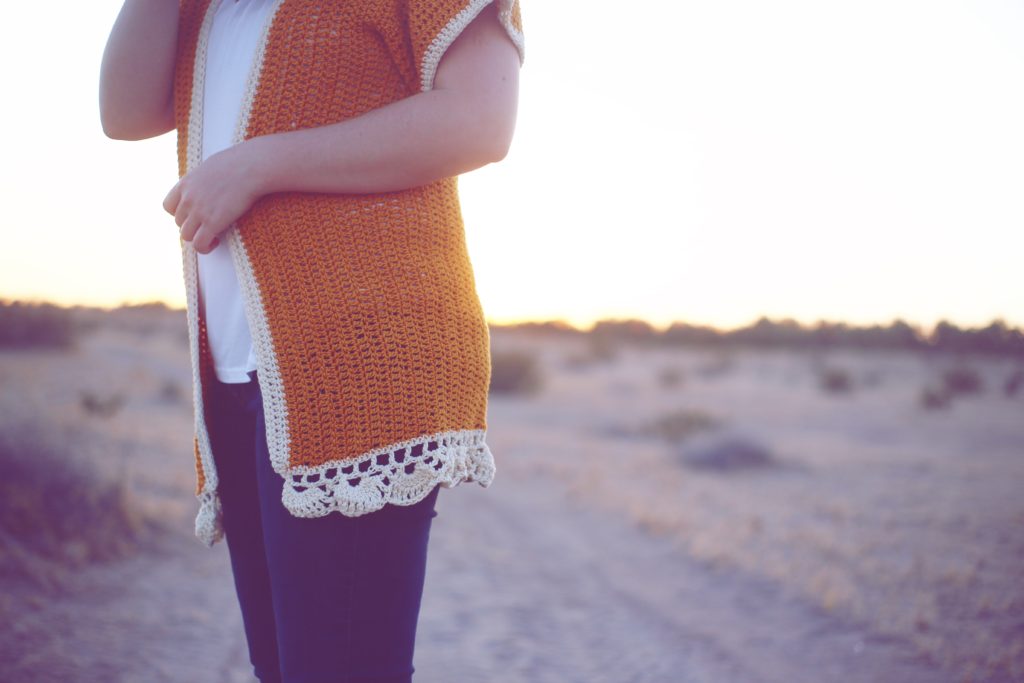
I love receiving hand me down clothes even more so now as an adult. Because gurl clothes are expensive! So I received this cute cardigan from a friend of mine, it was long sleeve with a scalloped edge. It was just slightly too small for me but it became my favorite cardigan. Well slightly too small became toooo small… thanks desk job…. so I decided to crochet a summer cardigan after the design!
Can you even believe summer is right around the corner already? 2019 is flying by so fast! Even though winter is my favorite season I think summer garments are my favorite to make, quick and easy is what it’s all about am I right?!
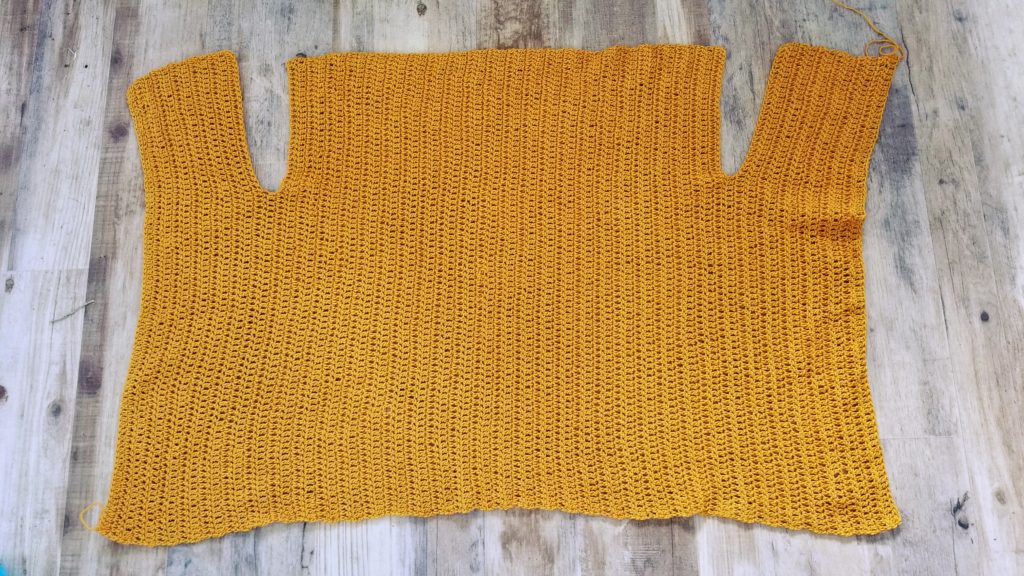
What I love about this design is the minimal seaming (only in the shoulders), it is worked in one piece, and it’s a great sit in front of the tv mindless kind of project.

I used Lion Brand’s 24/7 cotton which first off is great because it’s so light and airy and two I love this line because of the selection of colors Lion Brand has is amazing!
Pattern
-Pin the pattern for later here
-Get a copy of the ad free printable pdf pattern here
Materials
Lion Brand 24/7 Cotton Weight: 4, Medium- 3.5 oz, 186 yds
Main Color Approx: 775(870, 930, 1300, 1488) Yards
Contrast Color Approx: 85(110,160, 275, 320) Yards
US Size
Measurements
Bust: 34 (38, 42, 46, 52) inches.
Length (not including edging): 24(24, 26, 28, 28) inches.
Armhole: 10(10, 11, 12, 13) inches.
Notes
This cardigan has about 4 inches of positive ease for an oversized fit. For reference, model is 5’7” with a 36 inch bust and wearing the summer nights cardigan in the size Medium.
Stitch counts and measurements are written as XS(SM,M,L,XL). If you are between sizes please size down.
Turning chain does not count as a stitch.
Pattern is worked from side to side (left to right), in one piece.
The armholes are split by adding chains, then working upon those chains for the back and right side panels.
The only seaming you will do is at the shoulders, joining the front panels to the back panel.
Then the scallop edging is added last.
Pattern
Left Front Panel
Row 1: Fddc 78 (78, 84, 91,97), turn (If you would like to increase or reduce the length, add or remove sts here)
Row 2: ch 2, turn, dc into each stitch across. (78, 78, 84, 91,97) sts
Repeat row 2 until you reached the following number of total rows:
X-Small- work to row 12
Small- Work to row 14
Medium- Work to row 14
Large- Work to row 16
X-Large work to row 17
Center Panel
Row 13(15, 15, 17, 18): ch 2, turn, dc the following number of sts 45(45, 49, 52, 55), chain the following number of sts 34(34, 38, 41, 44), turn.
Row 14(16, 16, 18, 19): Dc into the 3rd ch from the hook, dc each stitch across. (78, 78, 84, 91,97)
Repeat row 2 until you reach the following number of rows (total, including left panel):
X-Small- work to row 48
Small- Work to row 52
Medium- Work to row 60
Large- Work to row 66
X-Large work to row 74

Right Front Panel
Row 49(53, 61, 67, 75): ch 2, turn, dc the following number of sts 45(45, 49, 52, 55), chain the following number of sts 34(34, 38, 41, 44), turn
Row 50(54, 62, 68, 76): Dc into the 3rd ch from the hook, dc each stitch across. (78, 78, 84, 91,97)
Repeat row 2 again until you reach the following number of rows (total including back and left panels):
X-Small- Work to row 60
Small- Work to row 67
Medium- Work to row 74
Large- Work to row 81
X-Large- Work to row 92
Keep your yarn attached, do not cut.
Sleeves
Turn your right panel inward, place stitch markers to align the top of your right front and back panels together, Seam the 2 pieces together by slip stitching (or your chosen seaming method) the two panels together until you reach the end.
Now we will add a small sleeve, ch2, dc into each stitch around repeat for 6(7, 7, 8, 9) rows.
Attach your yarn to the left side corner and repeat the same steps.
Attach your contrasting color, ch 1, hdc into each stitch around, repeat for a total of 2 rows. Repeat the same steps for the other sleeve.
Turn your work right side out.
Edging
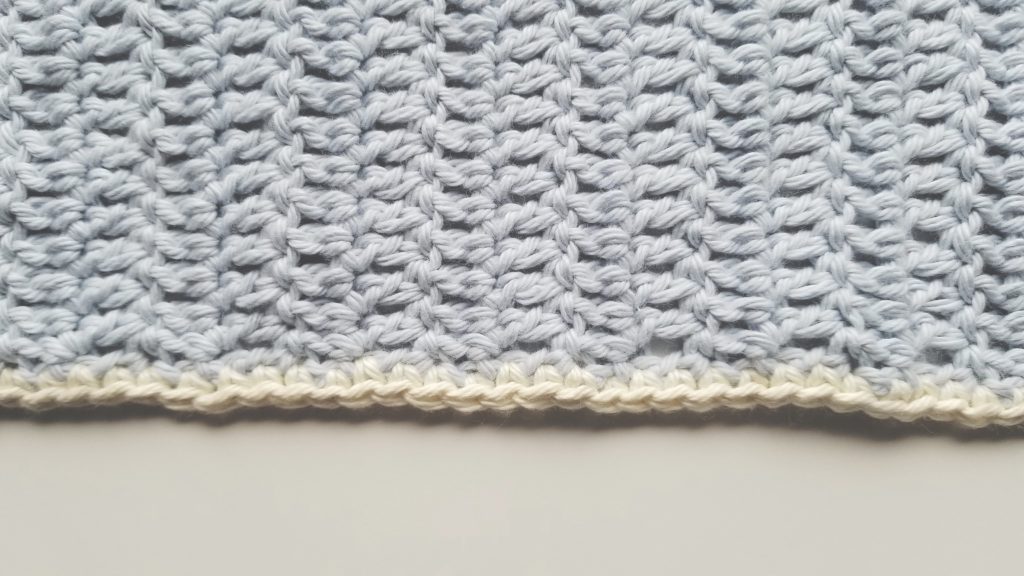
Collar
Attach contrast color to the bottom left corner, ch1, hdc into each stitch around from the base up around the collar, ch 1, turn, repeat for a total of 3 rows. Keep yarn attached.
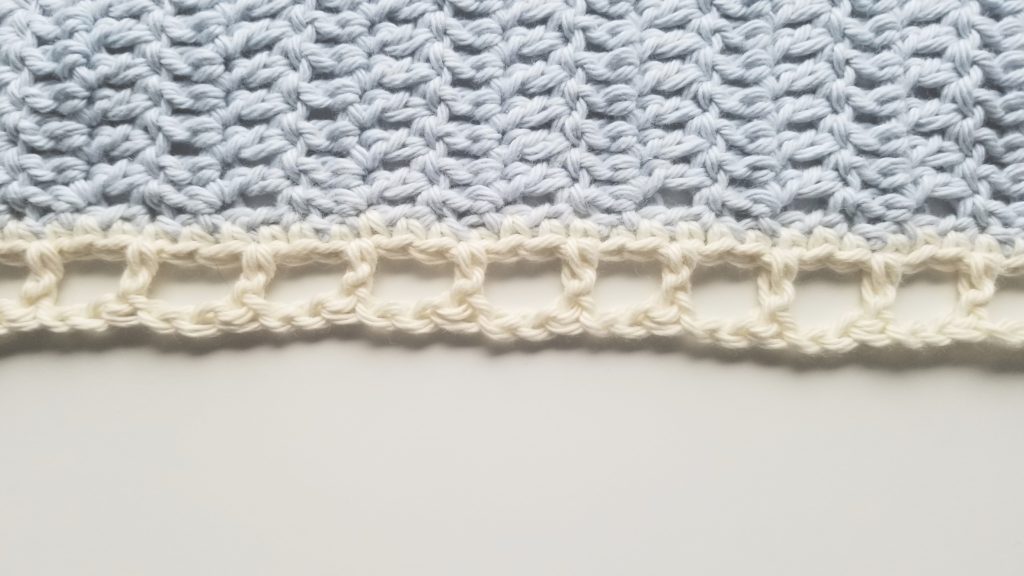
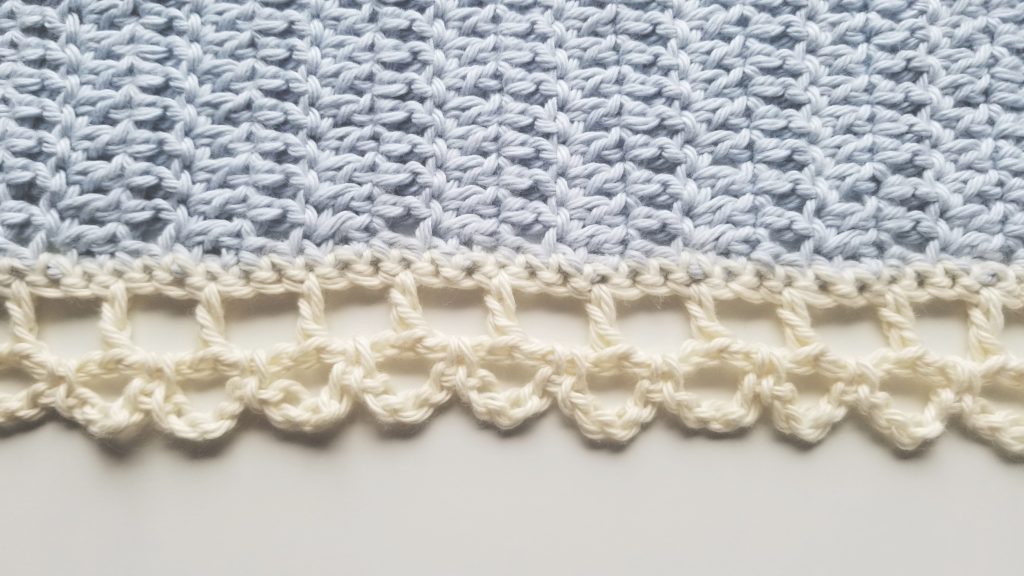
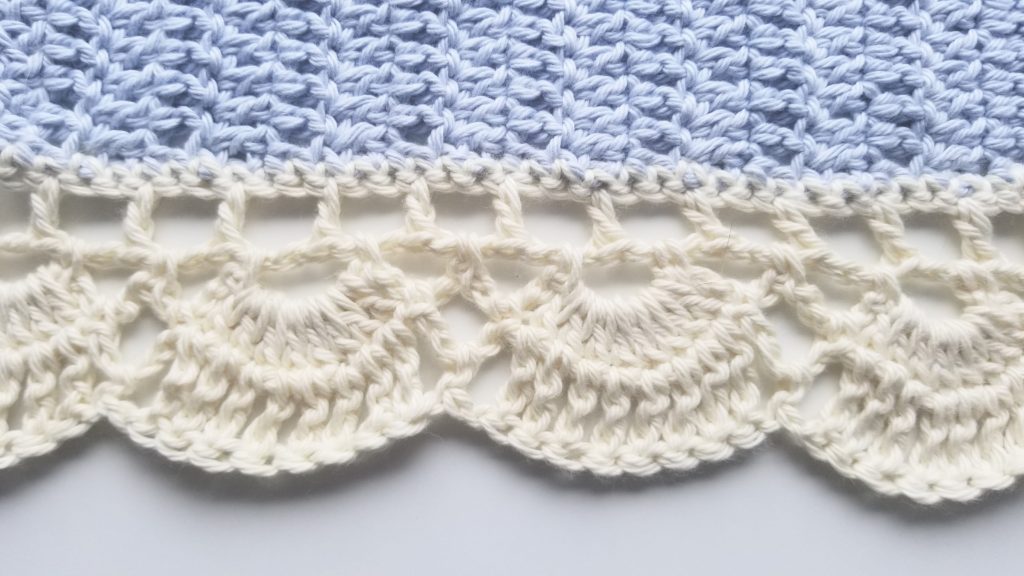
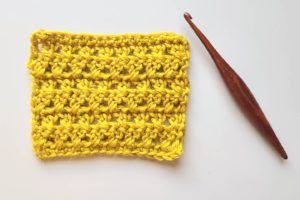
Scallop edge
Row 1: Sc 129(141, 156, 171, 192) along the bottom
Row 2: Ch 4, skip 2, dc into the next st. ch 2, sk 2, dc into the next st, repeat to the end.

Row 3: Ch 5, sc in between dc from the previous row. *Ch 4, sc in between each dc from the previous row*, repeat to the end.
Row 4: Ch 2, *dc 8 into ch 4 space, sc into the center of next ch space, ch 4, sc into next chain space*, repeat to the end.
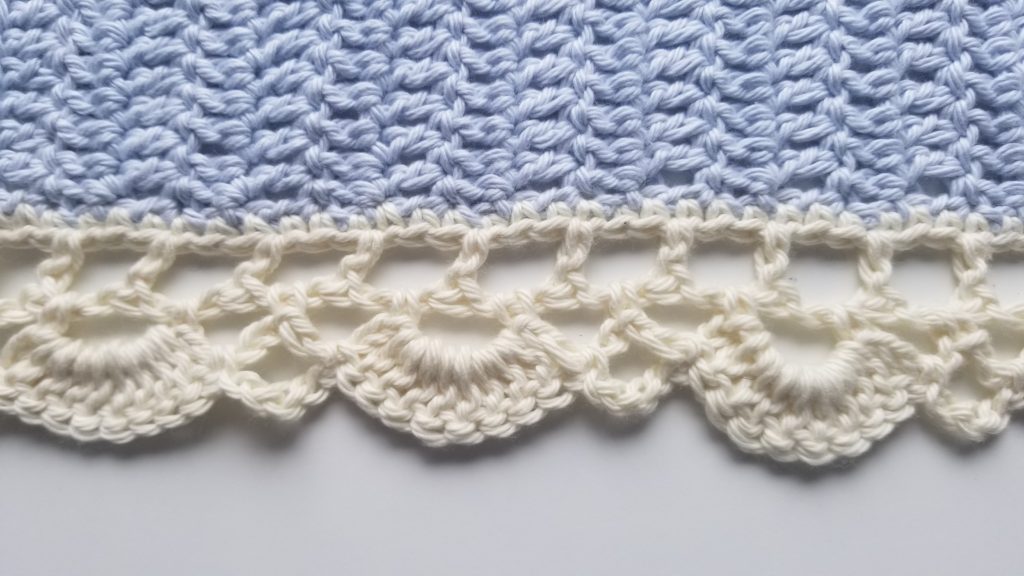
Row 5: Ch 3,*tr over the next 8 dc, ch1, hdc into the center of next ch space, ch1,* repeat to the end.
Weave in all of your ends and you’re finished! I’d love to see your finished pieces! Please tag me if you share photos on Instagram by using #summmernightscardigan or @BrindleBabeDesigns
This is an original pattern by Brindle Babe Designs ©2019. Distribution of any content including photos from this document in whole or in part is not allowed. You may sell finished pieces with this pattern but please include pattern credit to Brindle Babe Designs or link back to brindlebabe.com.

Video Tutorial Coming Soon!


Rexanna Franklin
7 Jan 2020First row Fddc 91? Second row 97?
admin
8 Jan 2020I’m sorry! typo it should be 97 Fddc.
Niels Snocks
13 Mar 2020very nice post, i certainly love this website, keep on it
deb
20 Feb 2021Sorry what is fddc….?
admin
23 Jun 2021Foundation double crochet
cialis generic
21 Jan 2022Hey just wanted to give you a quick heads up and
let you know a few of the pictures aren’t loading correctly.
I’m not sure why but I think its a linking issue.
I’ve tried it in two different browsers and both show the same outcome.
admin
26 Jan 2022It seems to be working on my end. It could be your connection or you may need to clear your cache.