Wander Hearts Knit Wall Hanging
This post contains affiliate links that help support Brindle Babe Designs Content.
If you would like to get straight to the pattern scroll down!
Happy love season! I don’t know about you but I will take any excuse for some self care. Even if you are not in a relationship I feel like Valentine’s is a great time to treat yourself. So go out buy yourself your favorite snacks, grab a few candles and take a long bath. I feel like self care is so important to decompressing and filling up your cup. We can all get so wrapped up in our busy lives that taking time for yourself is so important I know it’s one of the few things that keep me sane.
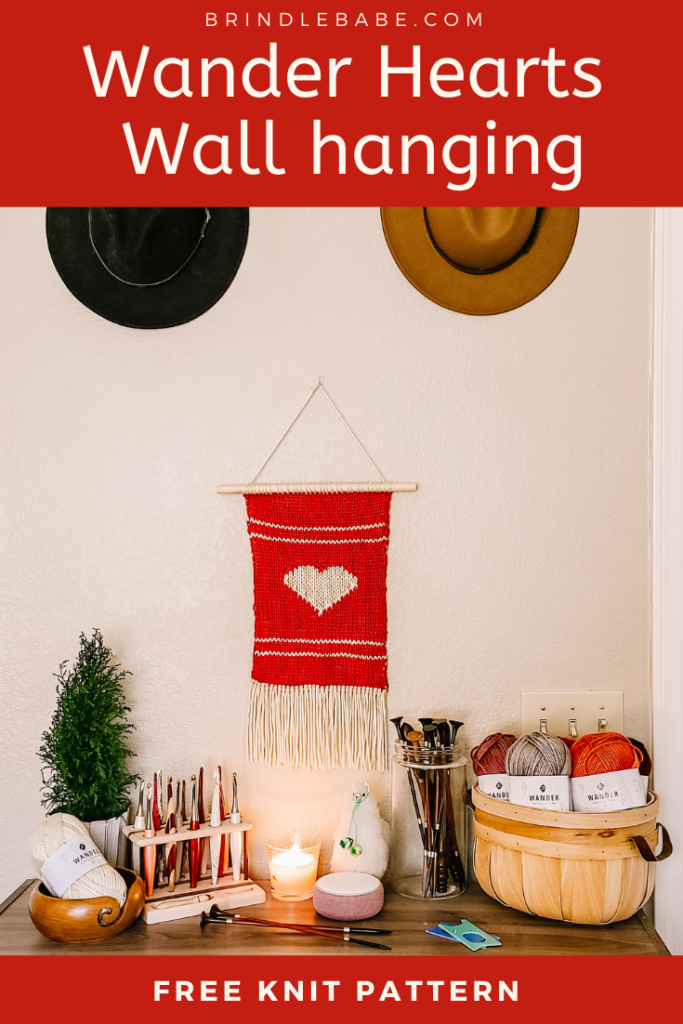
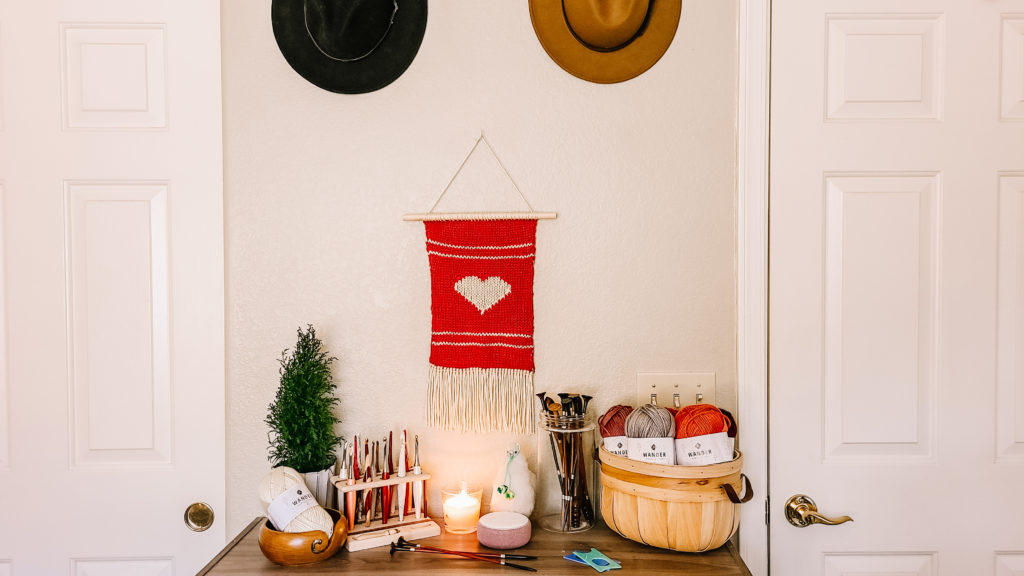
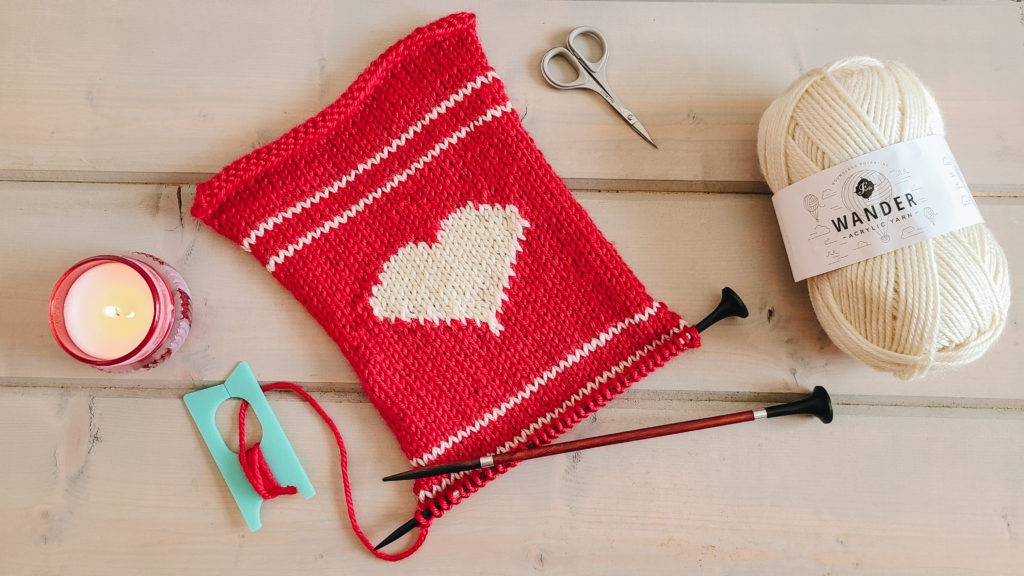
Practice your knit color work skills with this simple heart wall hanging. You can work up this pattern using straight knitting needles and worsted weight yarn and have it ready in time for Valentine’s day.
Check out the free pattern below to see how it’s made, or you can purchase the printable, ad-free version here.
Can’t get enough knit wall hangings? Last fall I designed another knit tassel banner that is very easy to work up.
Materials
Needles– 5.50mm Straight needles Knit Picks Radiant
Yarn Furls Wander Weight (4) Worsted, 120 yds
Color A: Pomegranate, 1 skein
Color B: Snow, 1 skein
Materials Tapestry Needle, Scissors, Wooden Dowel, Yarn Bobbins (optional), Crochet hook for adding tassels (optional)
Notes
Skill Level Intermediate
Measurements 12 inches long by 8.5 inches wide when blocked.
Abbreviations (US terms)
Co- Cast on
St- Stitch
K- Knit
P- Purl
Gauge Not important
Banner is worked using intarsia color work. A chart is included to indicate color changes, which are also given in the written instructions. Right side rows are worked in knit and read right to left, and wrong side rows are worked in purl and read left to right. Banner is worked from the top down.
Tutorial Coming Soon!
Pattern
CO 33 sts with color A
Row 1: k (RS)
Row 2: p (WS)
Repeat rows 1 & 2 until you have 11 rows
Row 12: p
Row 13: With color B, k
Row 14: With color A, p
Rows 15: k
Row 16: p
Row 17: With color B, k
Row 18: With color A, p
Row 19: k
Repeat rows 15 & 16 for until you reach 24 rows.
Begin color chart
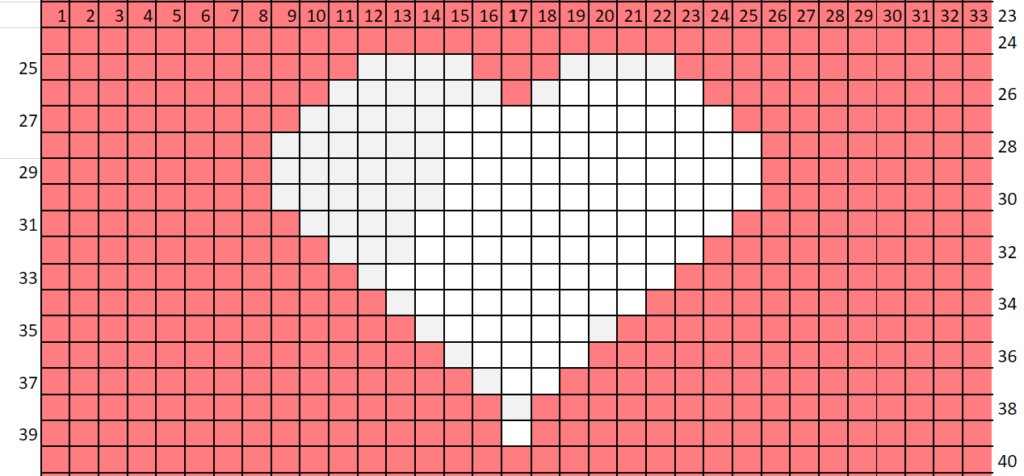
Row 25: k 11 with color A, k 4 with color B, k 3 with color A, k 4 with color B, k 11 with color A.
Row 26: p 10 with color A, p 6 with color B, p 1 with color A, p 6 with color B, p 10 with color A
Row 27: k 9 with color A, k 15 with color B, k 9 with color A.
Row 28: p 8 with color A, p 17 with color B, p 8 with color A. (repeat for 2 more rows)
Row 31: k 9 with color A, k 15 with color B, k 9 with color A.
Row 32: p 10 with color A, p 13 with color B, p 10 with color A
Row 33: k 11 with color A, k 11 with color B, k 11 with color A.
Row 34: p 12 with color A, p 9 with color B, p 12 with color A.
Row 35: k 13 with color A, k 7 with color B, k 13 with color A.
Row 36: p 14 with color A, p 5 with color B, p 13 with color A.
Row 37: k 15 with color A, k 3 with color B, k 15 with color A.
Row 38: p 16 with color A, p 1 with color B, p 16 with color A.
Row 39: k 16 with color A, k 1 with color B, k 16 with color A.
End color chart
Row 40: With color A p.
Rows 41-46: alternate k & p rows.
Row 47: With color B, k.
Row 48: With color A, p.
Row 49: k
Row 50: p
Row 51: With color B, k.
Row 52: With color A, p.
Rows 53-60: alternate k & p rows.
Row 61: Cast off all sts.
Finishing
Step 1: I recommend blocking your work here before adding tassels.
Step 2: Add tassels along the bottom.
We will now attach the banner to the dowel
Step 3: Take your tapestry needle, wooden dowel and about 18 inches of yarn. Using whip stich, whip yarn around dowel and through the top sts of your banner.
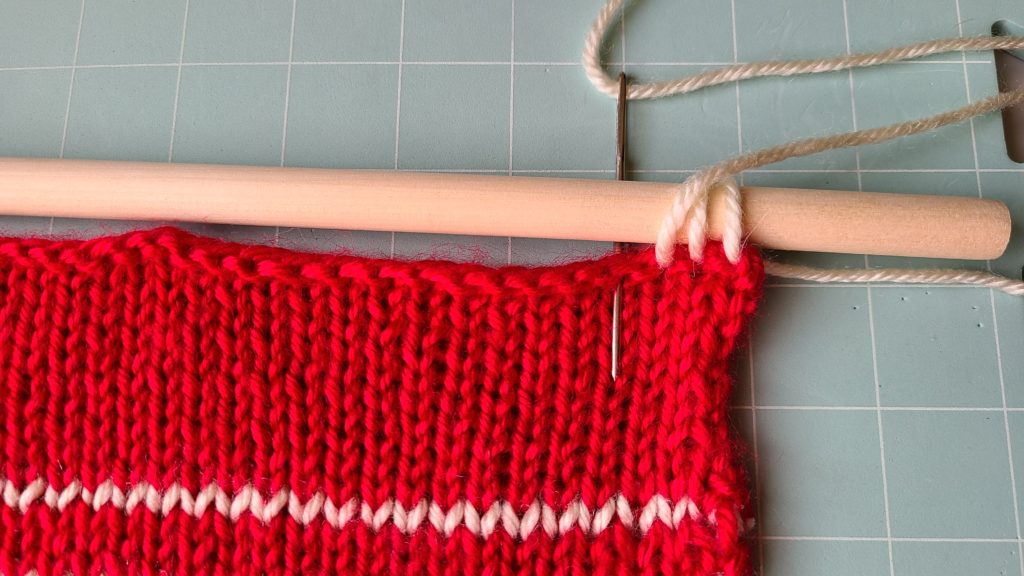
Step 4: Tie a loop so you can hang your banner.
Step 5: Weave in all ends.
Thank you so much for following along! I would love to see your finished pieces! Please tag me if you share photos on Instagram @BrindleBabeDesigns


