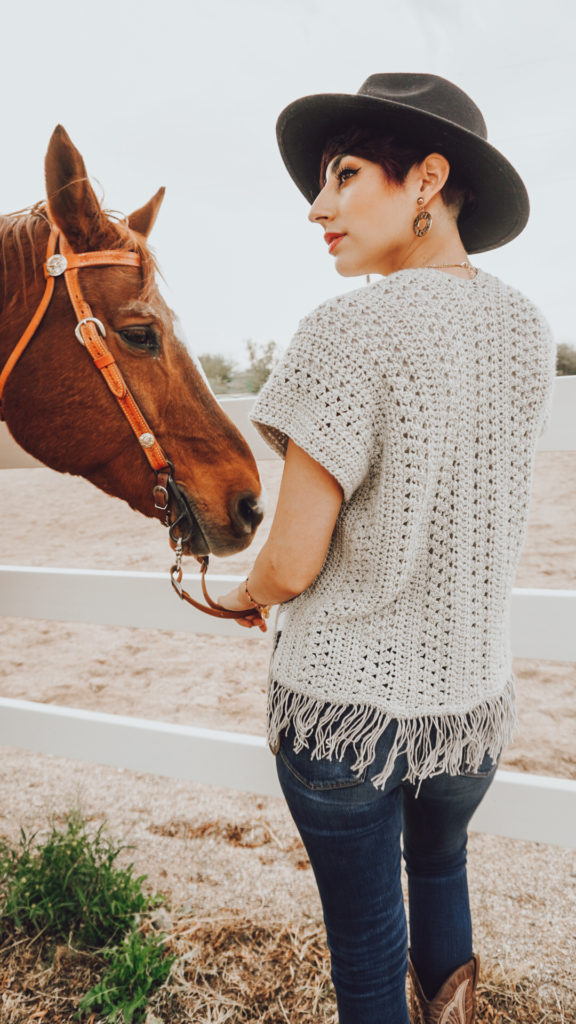
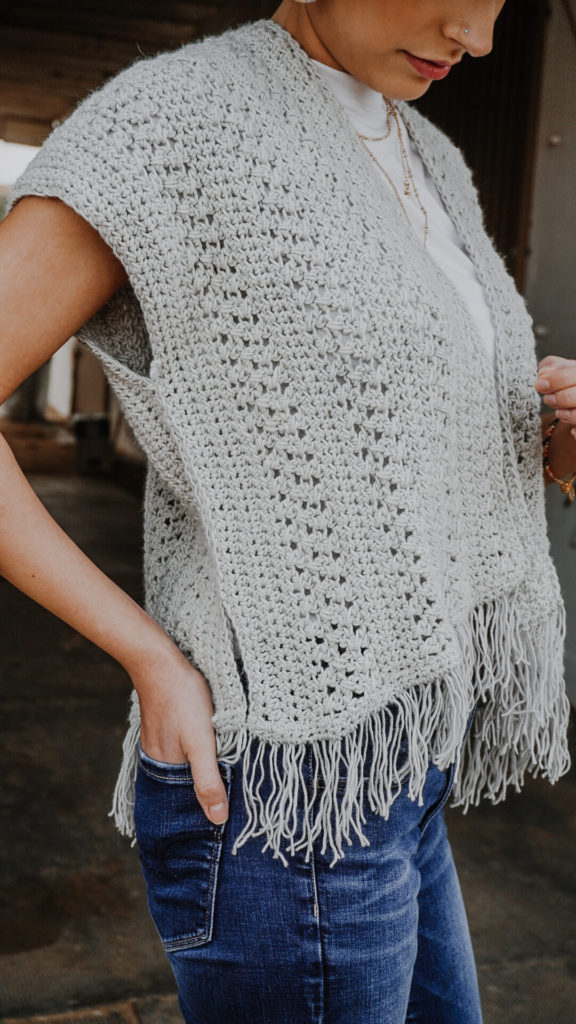
Snowdrop Crochet Cropped Cardigan

The Snowdrop crochet cardigan is the perfect piece to spice up any outfit for Winter or Summer!
If you want to get straight to the written free pattern scroll down!
This post contains affiliate links that help support Brindle Babe Designs Content.

Happy New Year! I know a lot of people are happy to see 2020 go, but there is a little part of me that was sad to see it go. 2020 wasn’t all bad for me personally. I adopted a sweet little shepherd mutt (Lola) from the shelter in March after losing my Addy suddenly, another shepherd I had rescued back in 2015. Lola really has been a joy in my life and helped me through my grief of losing my brindle girl Addy. Me and my guy ended up moving to Tucson when he was offered a job during the quarantine shut downs. Moving to Tucson has been such a blessing for us, we found a house that meets all our needs in a great community. Had we stayed in California we would have never been able to attain the things we have in Arizona and I am so thankful for that every day. Finally my family was pretty unaffected by the virus in regards to work and health so I am very grateful for that.

But time is inevitable so onto to 2021 it is! My biggest hope for this year is we find our way back to a place of unity as a country. This year I plan to explore knit a lot more than crochet and try new techniques to further my knowledge in this fun craft. I can’t wait to bring you many more patterns this year!

I’m very excited to be apart of the Furls Blog Hop once again this year.
The Furls Blog Hop is where each week a new designer features a new FREE pattern worked in the lovely Whims Merino yarn. Find all the past featured patterns here!
So a big thank you to Furls Crochet for providing the yarn to make this design possible!
Materials:
- Furls Crochet Whims Merino (Weight: 4/worsted – 94 yds, 3.5 oz) – color Light Grey – 5(6, 8) skeins
- Furls Streamline Swirl Café U.S. (G) 5.00 mm
- Scissors
- Stitch markers
- Tapestry Needle

Notes:
- Sizes XS/S (M/L, XL/2X)
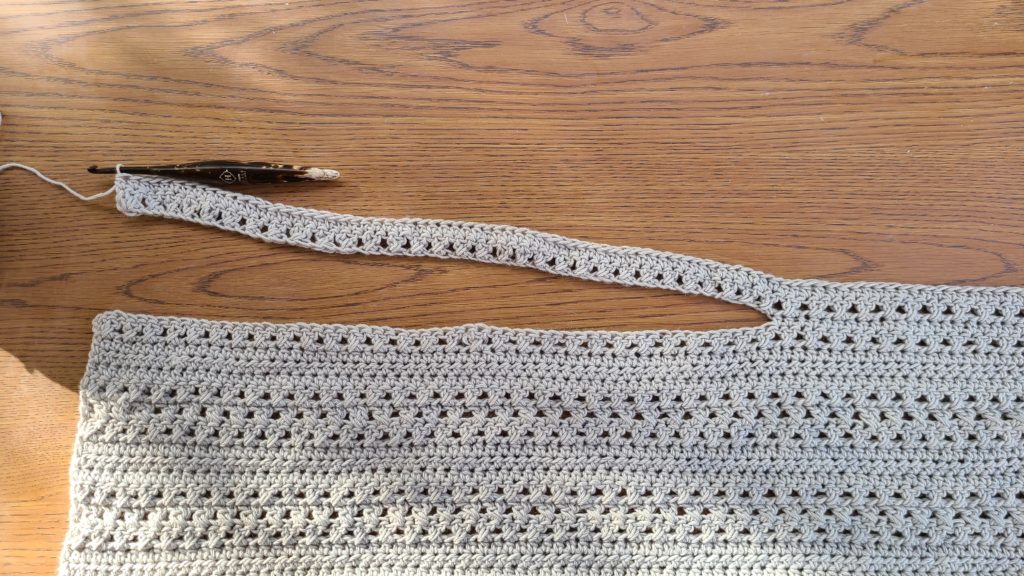
- Cardigan is worked in one piece starting from left to right.
- The front half of your work is split to form 2 front panels.
- Chains at the beginning of each row do not count as a stitch
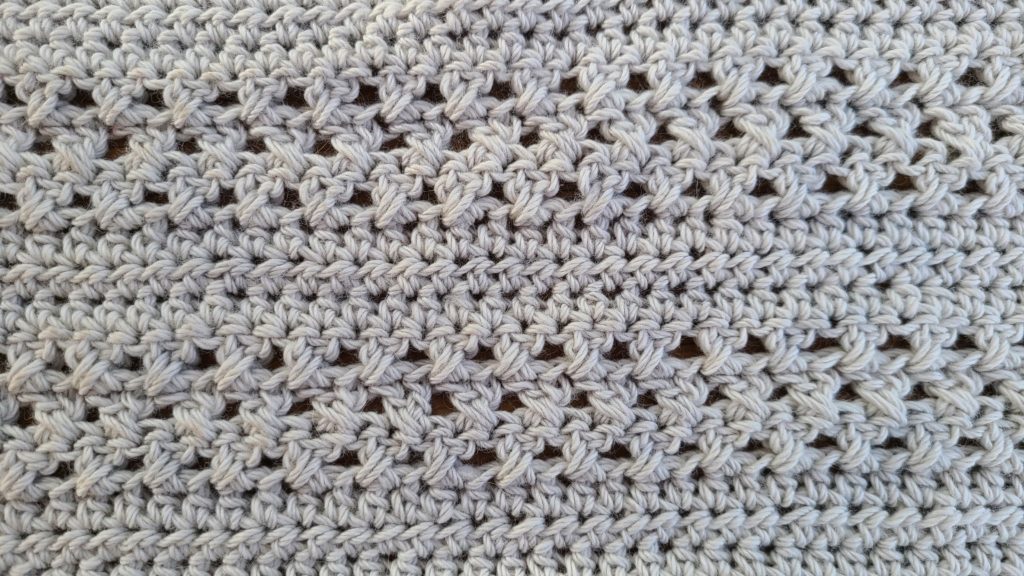
- Most of the cardigan is worked in a 6 row repeat consisting of half double crochet rows and crossing double crochet rows. – The sides are seamed up to form the armholes.
- If you would like to add length to the cardigan you will do that with your starting chains which is a multiple of 2 + 1.
Gauge: 4” X 4” In half double crochet. 13 stitches X 9.5 Rows.
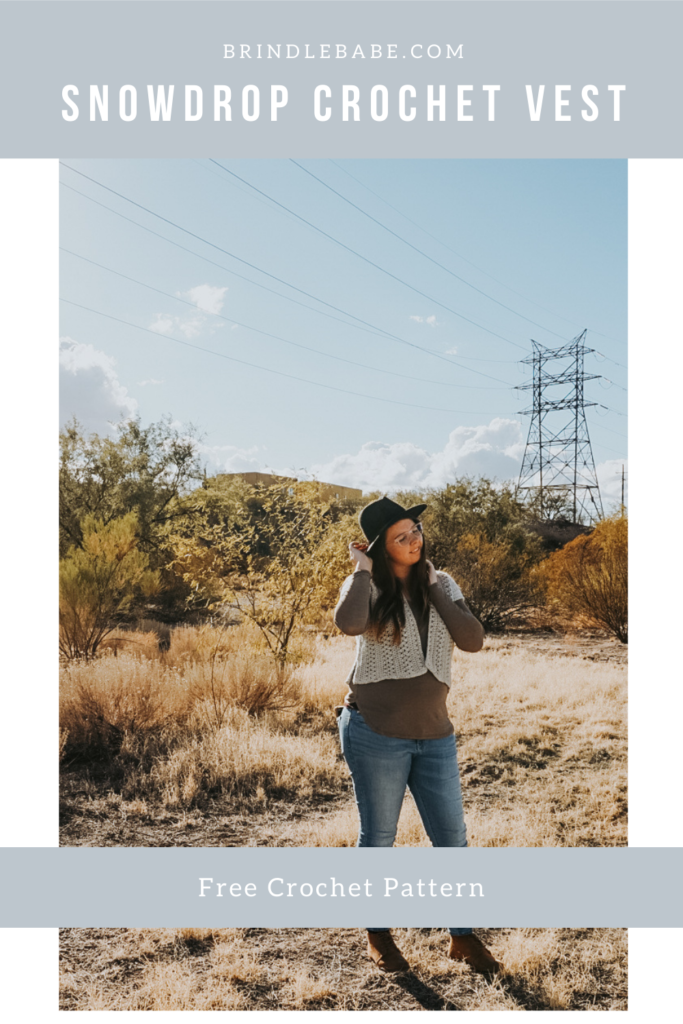
Purchase the ad free printable pdf here!
Abbreviations (US terms):
Ch- Chain
St- Stitch
Sk- Skip(ped)
Sc- Single Crochet
Hdc- Half Double Crochet
Dc- Double Crochet
Measurements:
| XS/S | M/L | XL/2X | |
| Chest | 32” | 40” | 48” |
| Length | 19” | 20” | 21” |
| Armhole Depth | 7” | 8” | 9” |
Pattern
Ch 125(131, 139)
Step 1: hdc into the 2nd ch from the hook, hdc each ch across, turn. [124, 130, 138]
Step 2: ch1, hdc each st across, turn.
Step 3: Repeat row 2 for (2, 3, 2) more rows.
Step 4: ch2, sk first st, dc into 2nd st from the hook, dc into first skipped st, *sk 1 st, dc, dc into first sk st, rep from* to the last st, dc into last st, turn.
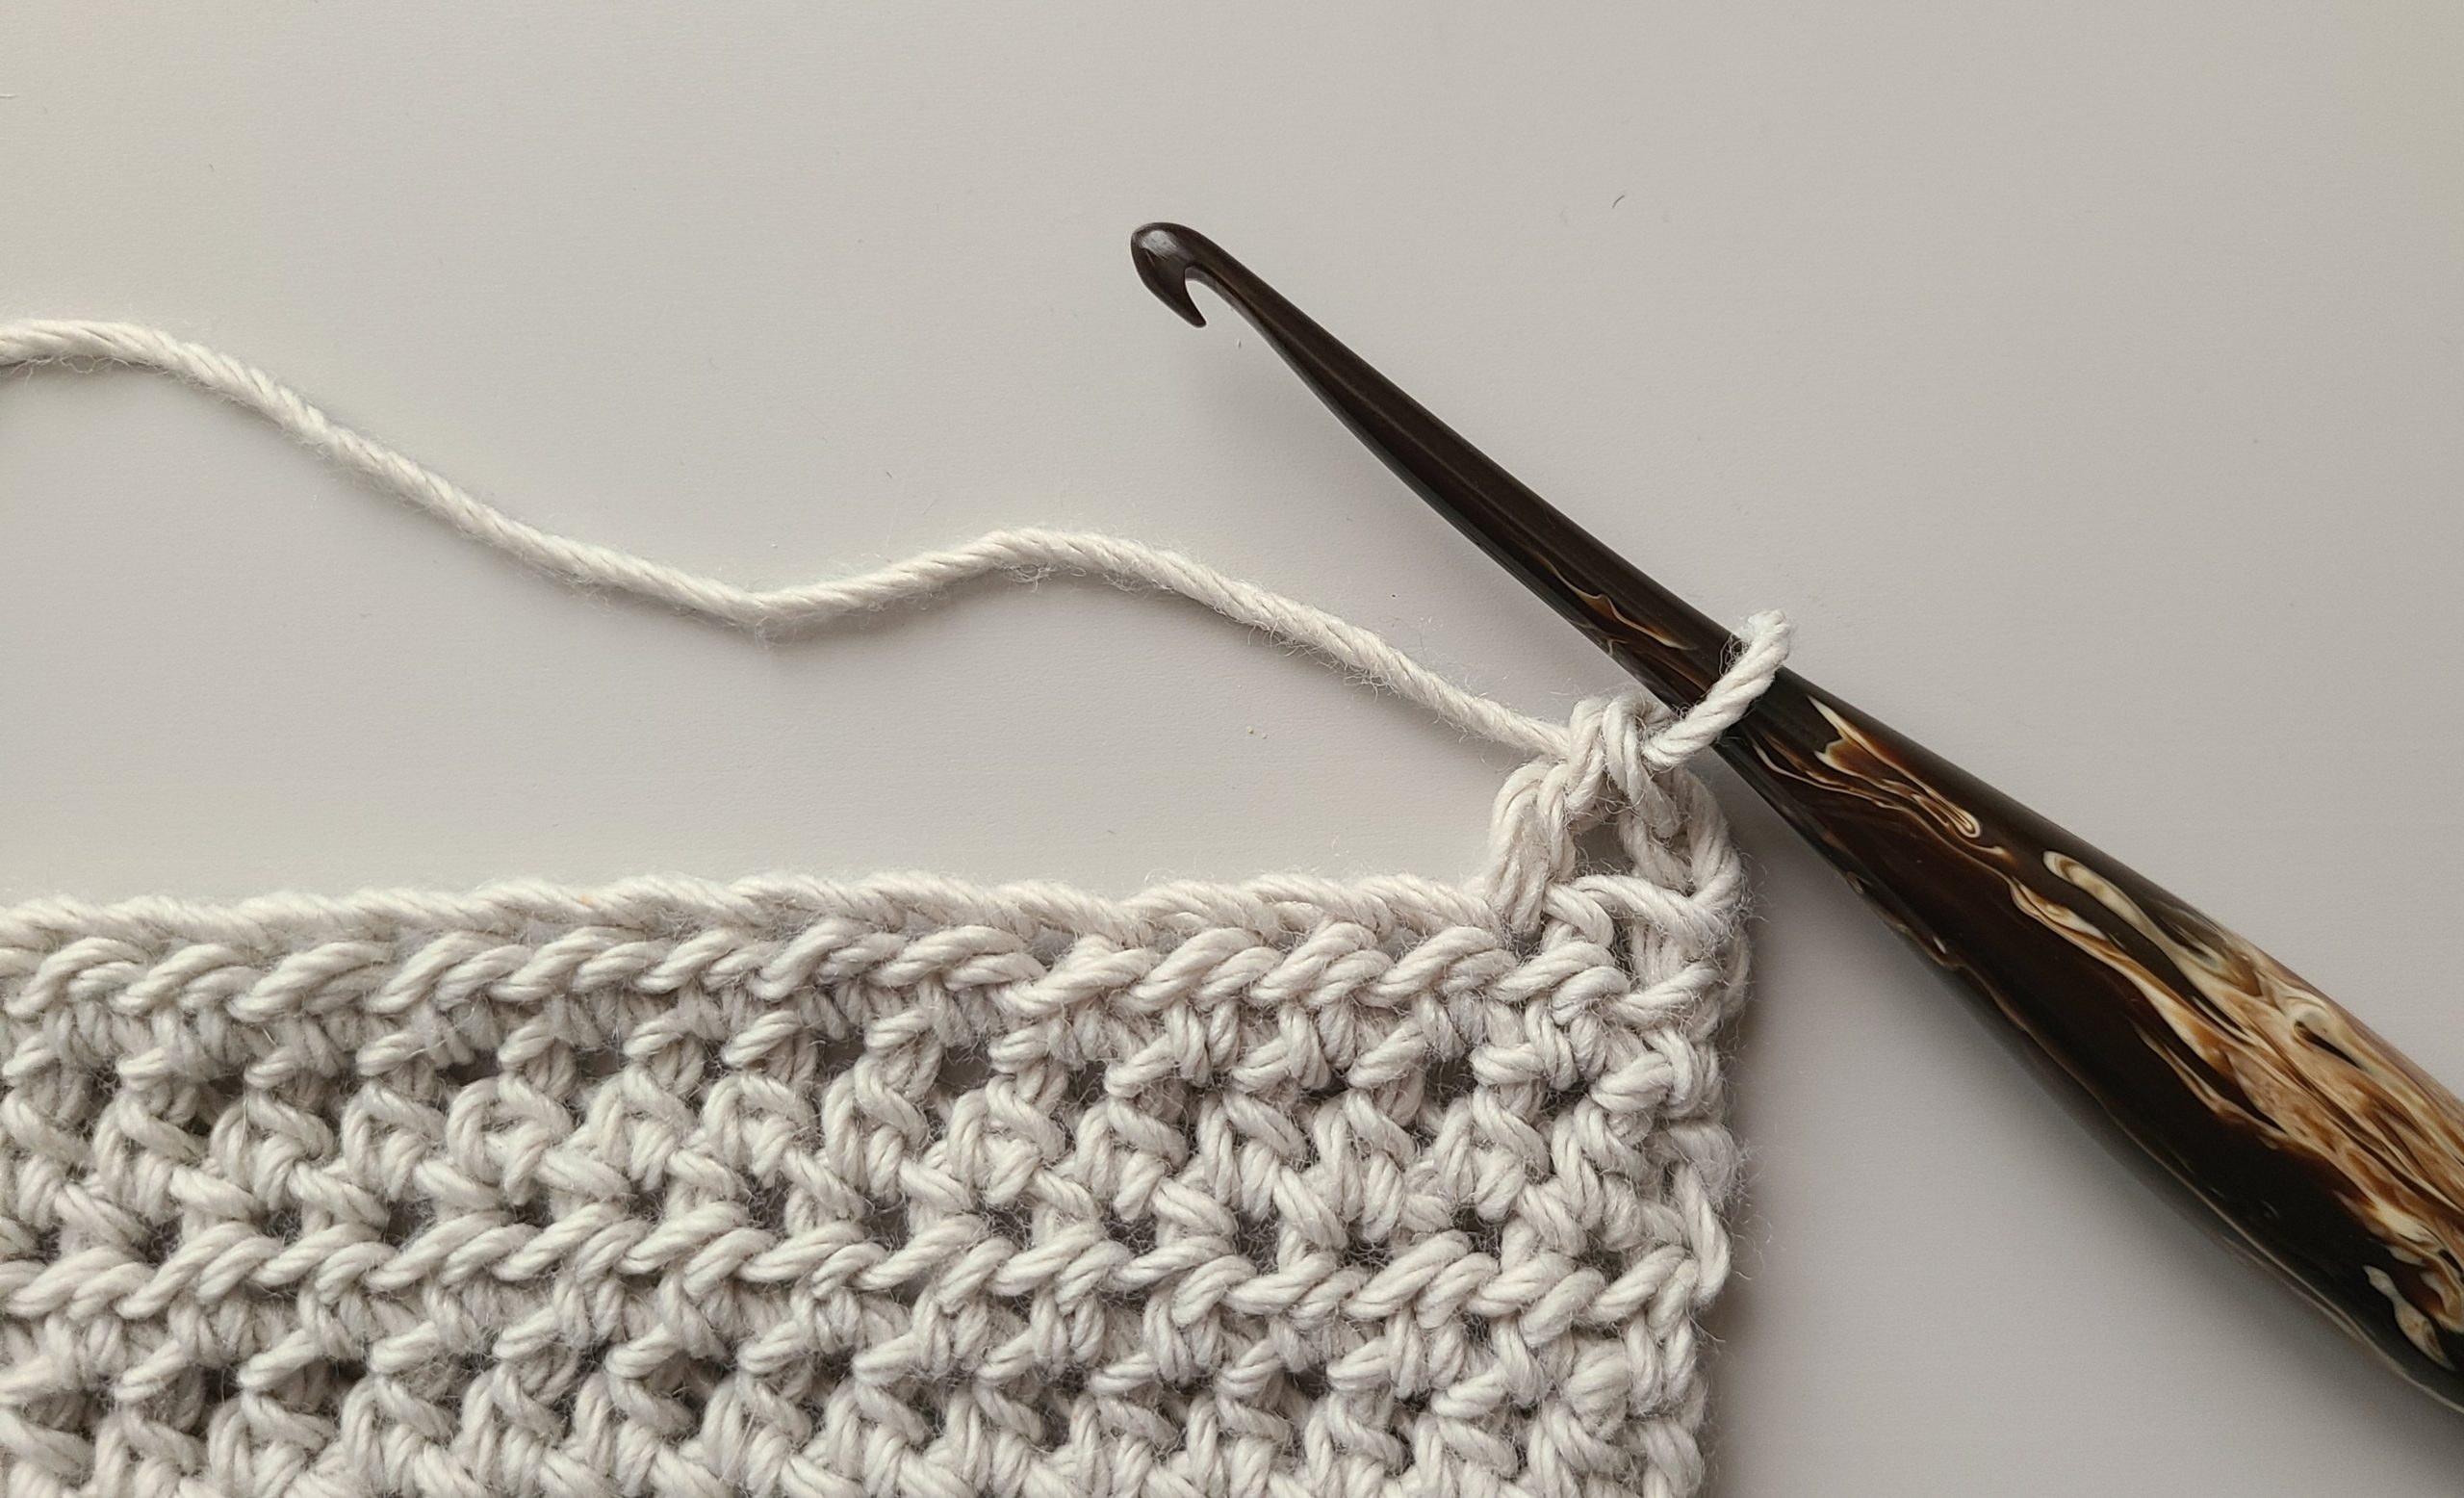

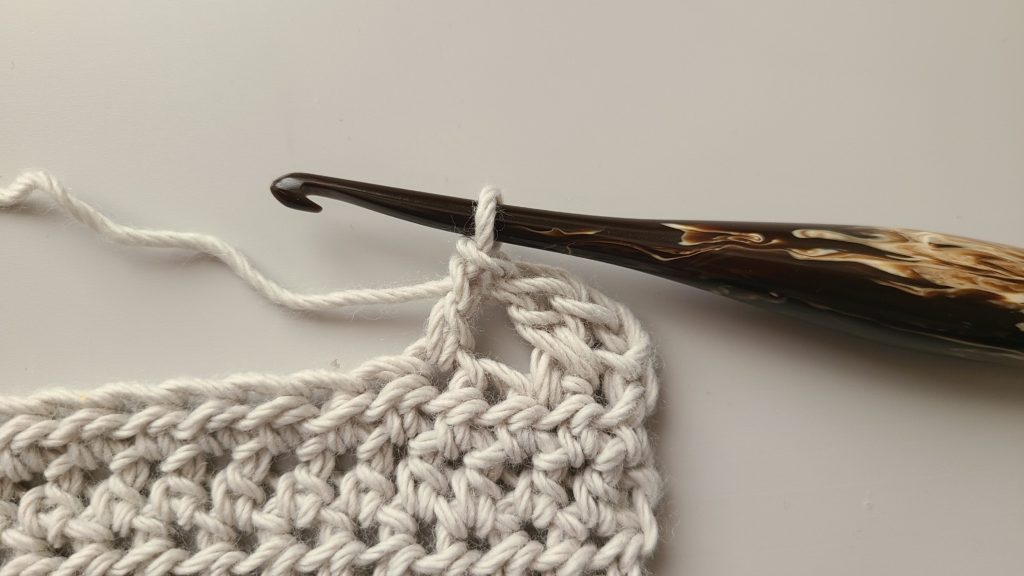

Step 5: ch2, sk first st, dc into 2nd st from the hook, *sk 1 st, dc, dc into sk st, rep from* to the last st, dc into last st, turn
Step 6: Repeat step 4.
Step 7: ch1, hdc each st across, turn.
Step 8: Repeat step 7 for 2 more rows

Step 9-
XS/S- Repeat steps 4-8 until you reach 19 total rows.
M/LG- Repeat steps 4-8 until you reach 23 total rows. Repeat step 4.
XL/2X- Repeat steps 4-8 until you reach 28 total rows. Repeat step 4
We will now split the front half of our work to form the right-side front panel
If you added additional stitches for length divide your total number of stitches in half that is how many stitches you will work in step 10. Then you will chain the same number of stitches you have left + 2 chains. Then continue working as normal.
Step 10: ch1, hdc (62, 65, 69) sts, ch (64, 67, 71) sts, turn.
Step 11: dc into 4th ch from the hook, dc into 3rd ch, *sk1 ch, dc, dc into sk ch, rep from* to the last st, dc into last st, turn.
Step 12: ch1, hdc each st across, turn.
Step 13: Repeat step 12 for 2 more rows.
Step 14-
XS/S- Repeat steps 4-8 until you reach 14 total rows (from where you split your work). Then repeat step 2 for 4 rows.
M/LG- Repeat steps 4-8 until you reach 18 total rows. (from where you split your work). Then repeat step 2 for 5 rows.
XL/2X- Repeat steps 4-8 until you reach 24 total rows (from where you split your work).. Then repeat step 2 for 4 rows.
*You should end with a total of 38(48, 58) rows
Seaming
Step 15: Fold your work in half lining up your outside corners from the back to front .
Step 16-
XS/S- Count 8 sts up (this will be your split seam at the bottom), attach yarn and seam up 31 sts.
M/LG- Count 10 sts up (this will be your split seam at the bottom), attach yarn and seam up 29 sts.

XL/2X- Count 10 sts up (this will be your split seam at the bottom), attach yarn and seam up 30 sts.
Finishing
Step 17: Attach yarn to the bottom left front corner, ch1, sc into each st around, working along the bottom of your panels and up and around the collar to the other side panel.
Step 18: attach yarn to the back side, ch1, sc along the bottom.
Weave in any ends and you are finished!
Thank you so much for following along! I would love to see your finished pieces! Please tag me if you share photos on Instagram @BrindleBabeDesigns or use #snowdropcardi

This is an original pattern by Brindle Babe Designs ©2020. Distribution of any content including photos from this document in whole or in part is not allowed. You may sell finished pieces with this pattern but please include pattern credit to Brindle Babe Designs or link back to brindlebabe.com.
Video Tutorial Coming Soon!

In the meantime subscribe for other crochet & knit tutorials here!

Murleen L Ray
11 Jan 2021I love love the stitch pattern but want a longer vest, not a crop top. How would you calculate how much more yarn would be needed to add another 8 inches to the length?
admin
11 Jan 2021I’m so glad you like it! This is a rough estimated but depending on the size you work up you would need approx. 3-4 additional skeins if you’re using the Furls Whims Merino.
Jackie
11 Jan 2021Hi, love the pattern!
Any instructions on how to make it longer?
admin
11 Jan 2021Thank you! As long as you have an even number of stitches you can add as many stitches as you like. Then when you split to make the front panels you just need to account for that and just work half of the total stitches before splitting.